
THE CLOUD LAVENDER KIT ✦ FREE TUTORIAL
Let’s grow some cloud lavender
Oversized felt blooms in a tiny terracotta pot, a whimsical take on lavender that plays with scale and never needs watering. You’ll fold, fringe, and spiral-wrap felt strips into wired stems before arranging your perfect plant.
IntermediateOne – three hoursNo sewing, just glue
FOLLOWING ALONG FROM PINTEREST?
Everything in this tutorial comes in the kit
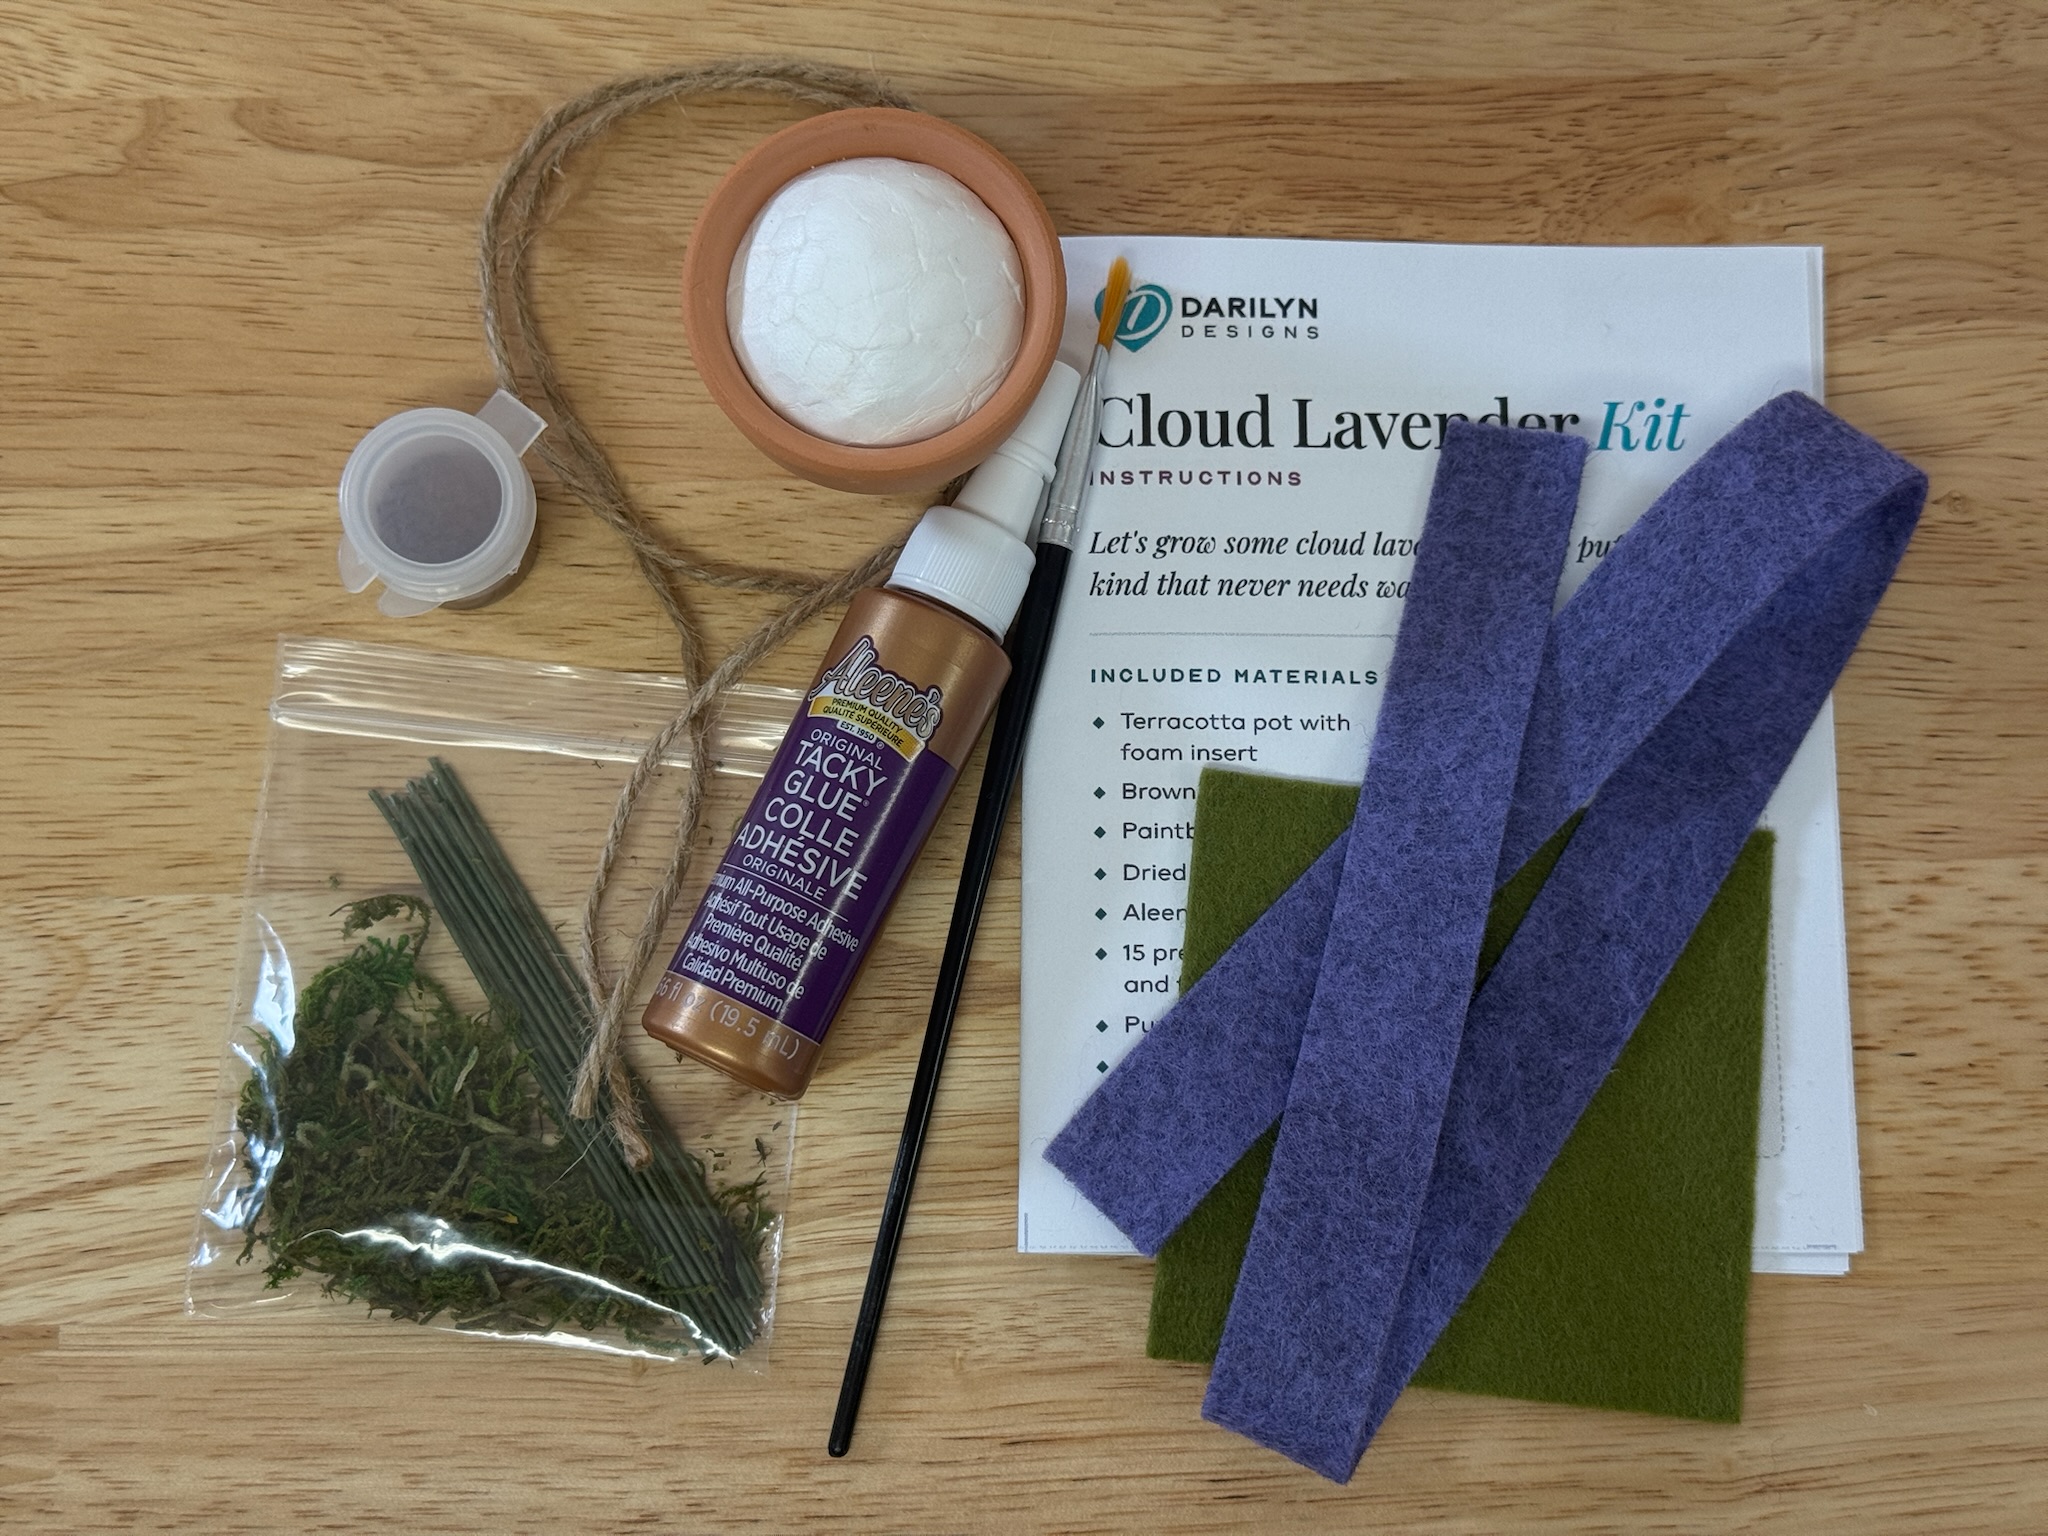
Our Cloud Lavender Kit has the whole plant in the box: the terracotta pot with its foam insert, brown acrylic paint and a brush, dried moss, Aleene’s Original Tacky Glue, pre-cut wires, wool-blend felt for the flowers and leaves, and twine for the bow. There are two flower color options, Pale Blue or Deep Purple.
Before you begin
You’ll need scissors and a hot glue gun. Anywhere we call for hot glue, the tacky glue in the kit works too, it just needs more time to set, so give it that time before you put tension on the piece. If you’re painting somewhere precious, lay down newspaper first.
The pot has to dry before you can plant anything in it. That’s why the pot comes first in the steps below. Paint it, set it aside, and make your stems while it dries.
As you work through the steps, keep in mind that this kit is all about scale and silhouette. There are two judgement calls you’ll make that let you practice: how you handle the fringe (glued closed is easier to work with, a touch narrower in bloom) and how you lay out your plant. There’s extra material in the box on purpose. Our example pot has 7 leaves and 6 flowers, but you have enough felt and wire to add one more of either. Match our example, or trust your eye.
Growing the lavender
1Prep the pot
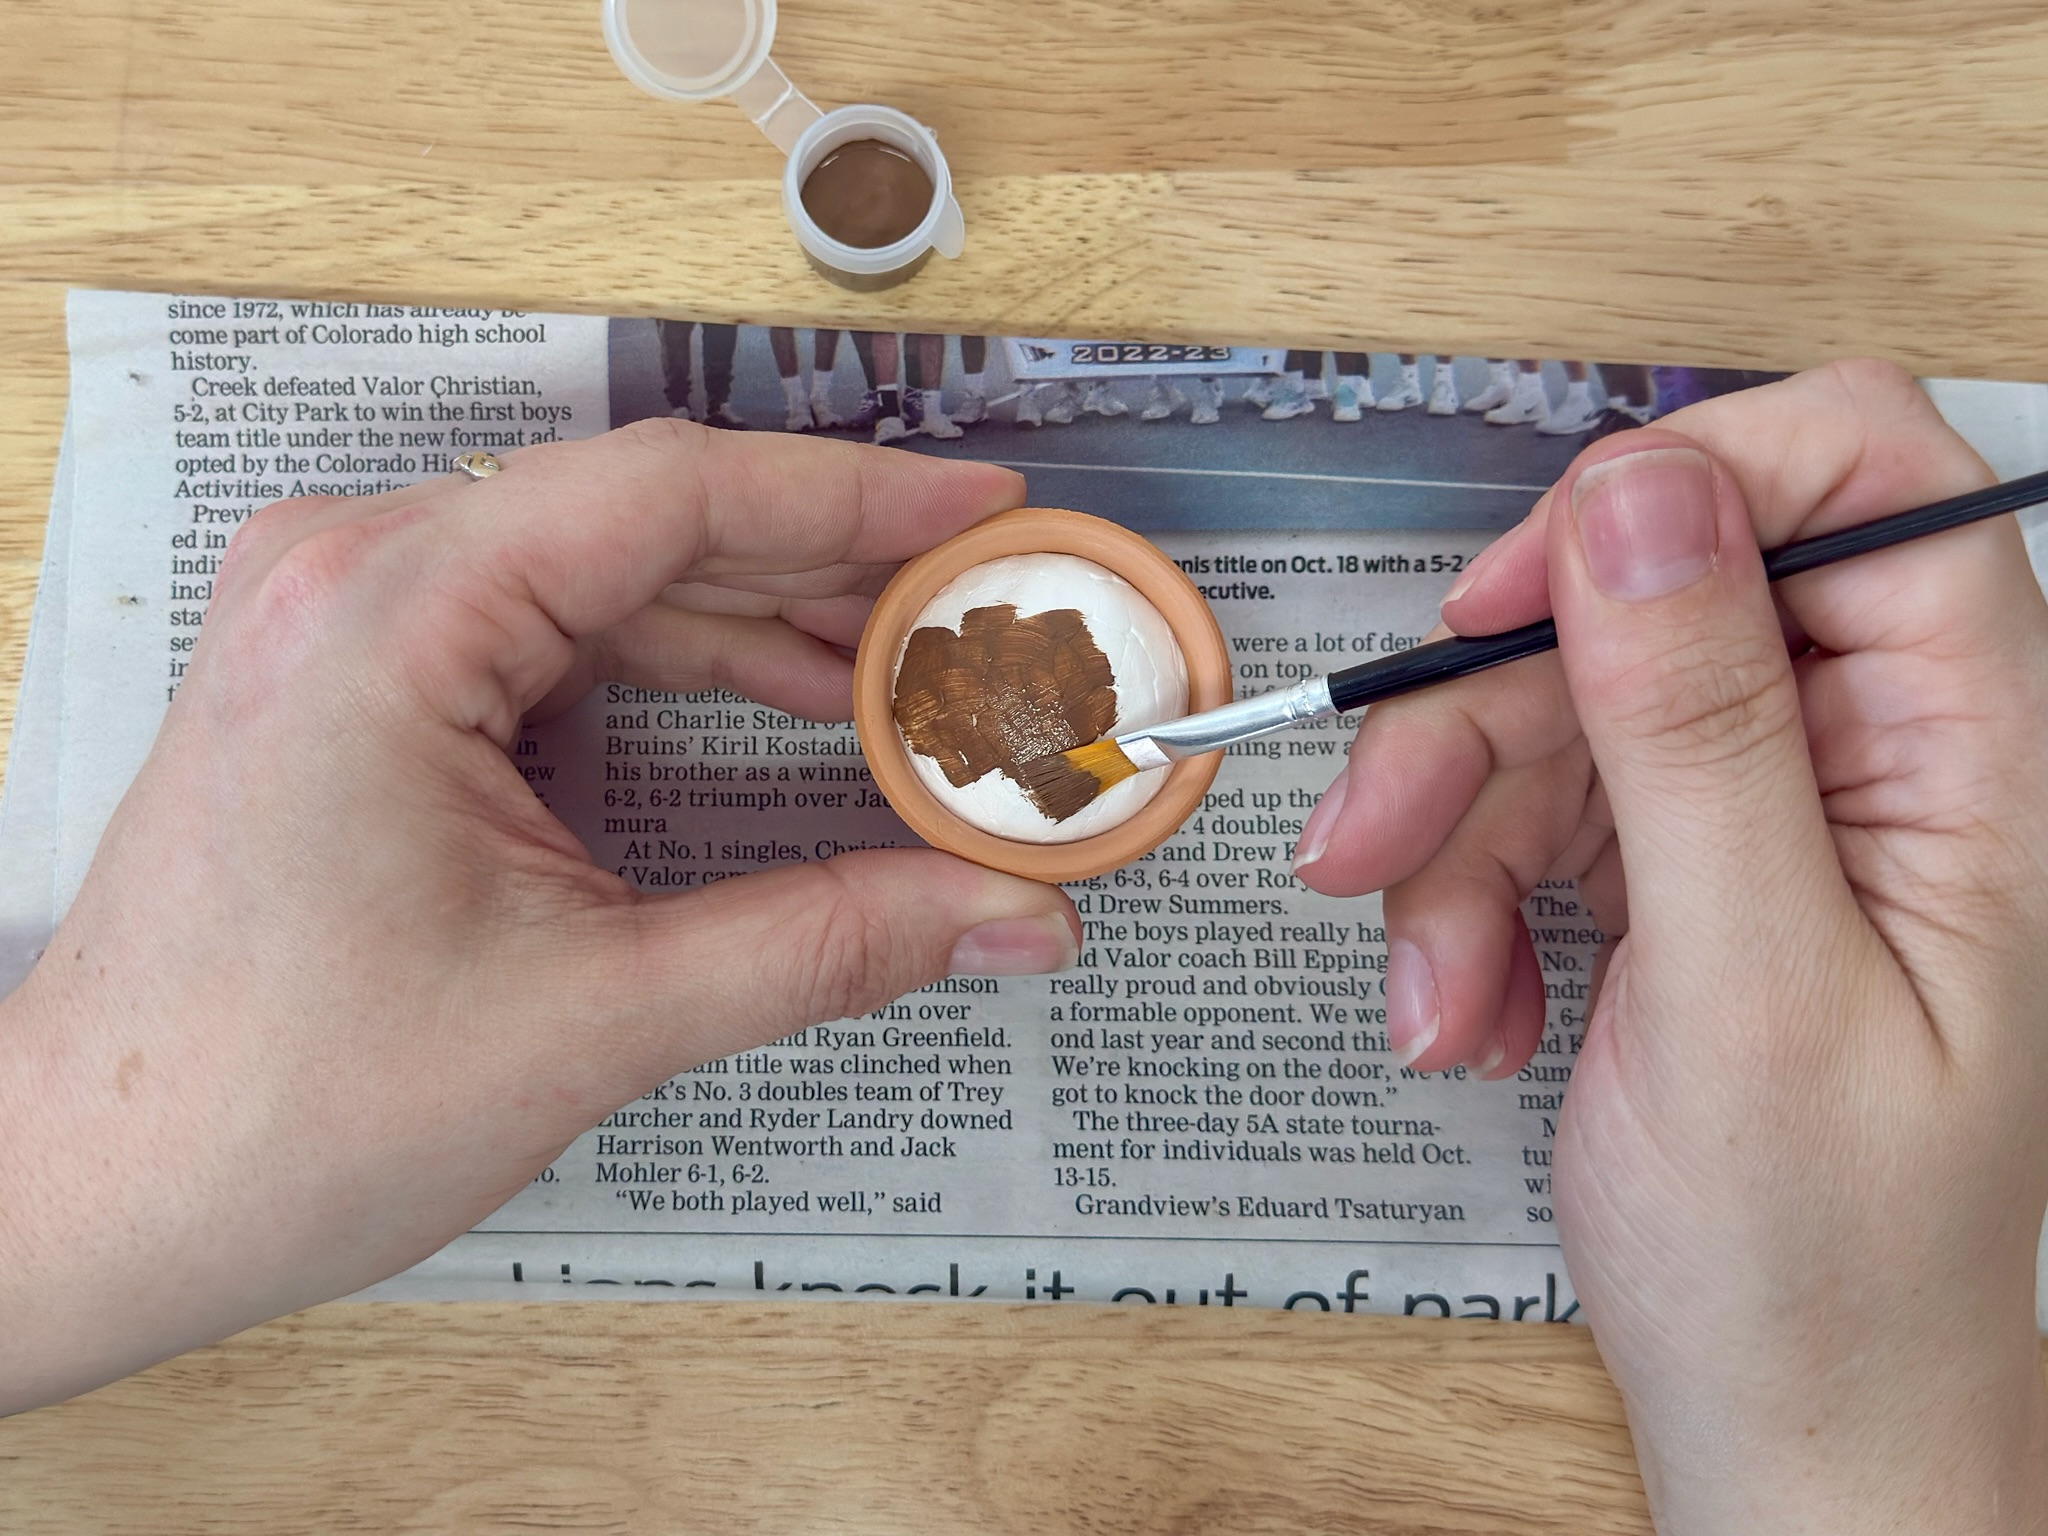
Paint the foam insert and set it aside to dry. One coat covers; we normally do a second for deeper color.
Once the paint is dry, spread a thin layer of tacky glue over the painted foam and press the moss down firmly.
2Cut and assemble the leaves
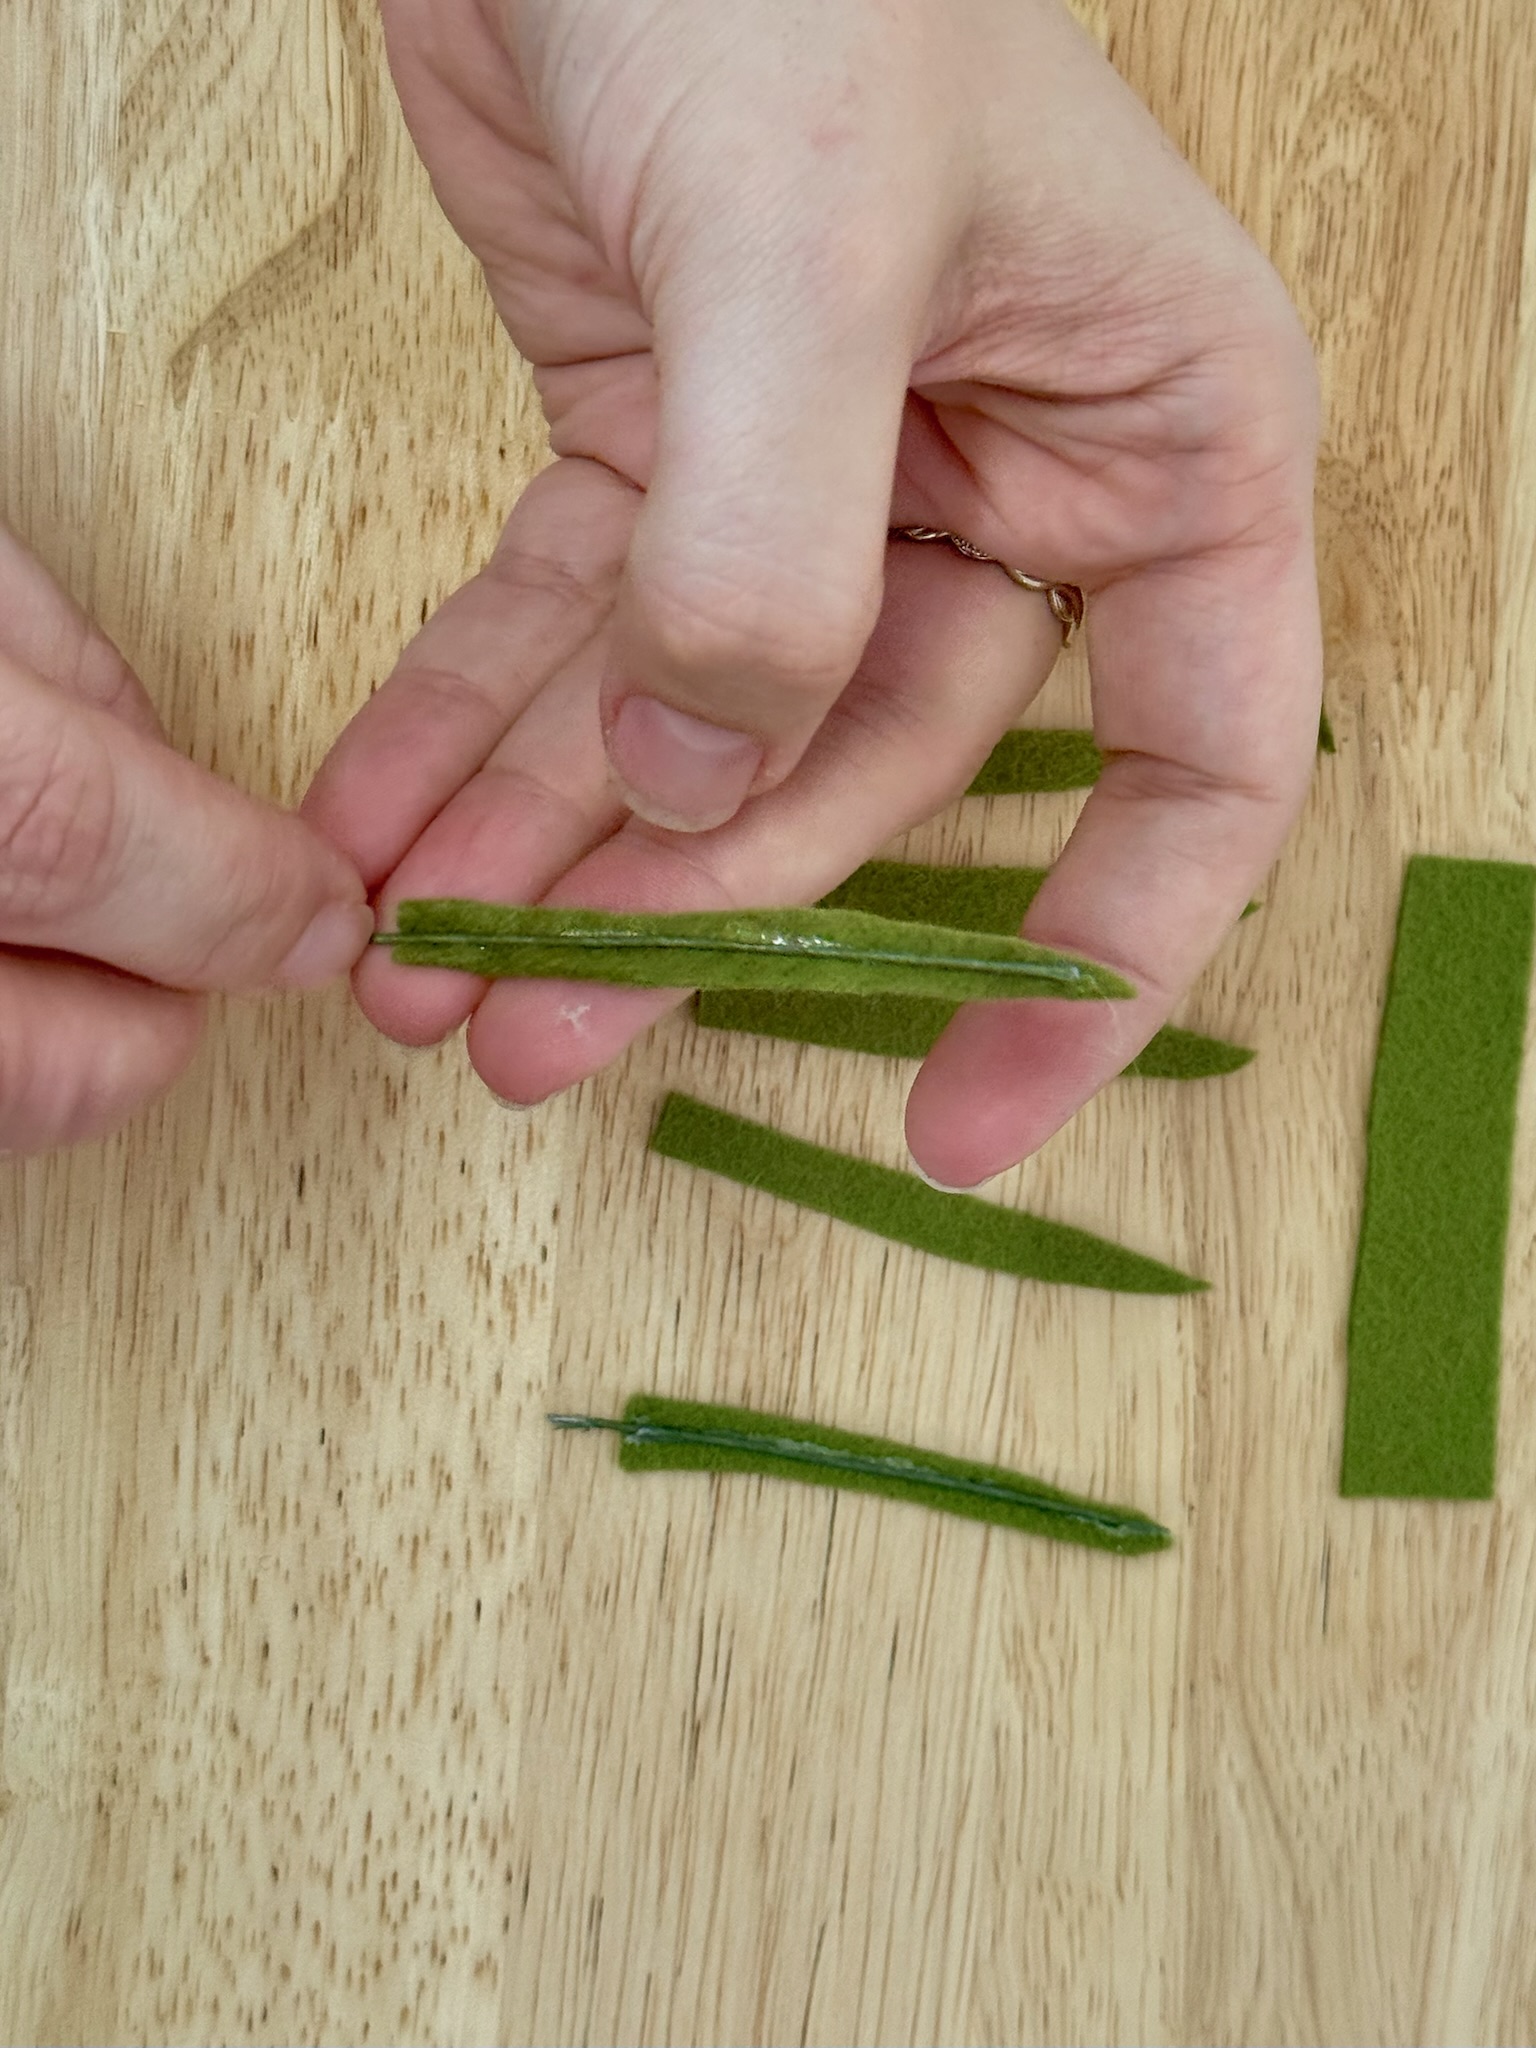
Cut 7 leaves from the green felt, long and slender, with a gently tapered point. We cut ours freehand so there’s natural variation, but your booklet has the exact dimensions and a traceable template on the back page if you’d rather not eyeball it.
Run a thin line of either tacky glue or hot glue down the center of a leaf and press a wire into it. The wire side is the underside. Repeat for the rest.
The wire is what makes the leaves poseable. Once the plant is together, you’ll curve each leaf over your finger into a gentle arc so it drapes like a real plant. Don’t worry about that yet; just get the wires on.
3Make the flowers
This is a foundational flower technique, so take your time with the first one. Nobody’s first flower is their best flower, and the strip has room built in for that.
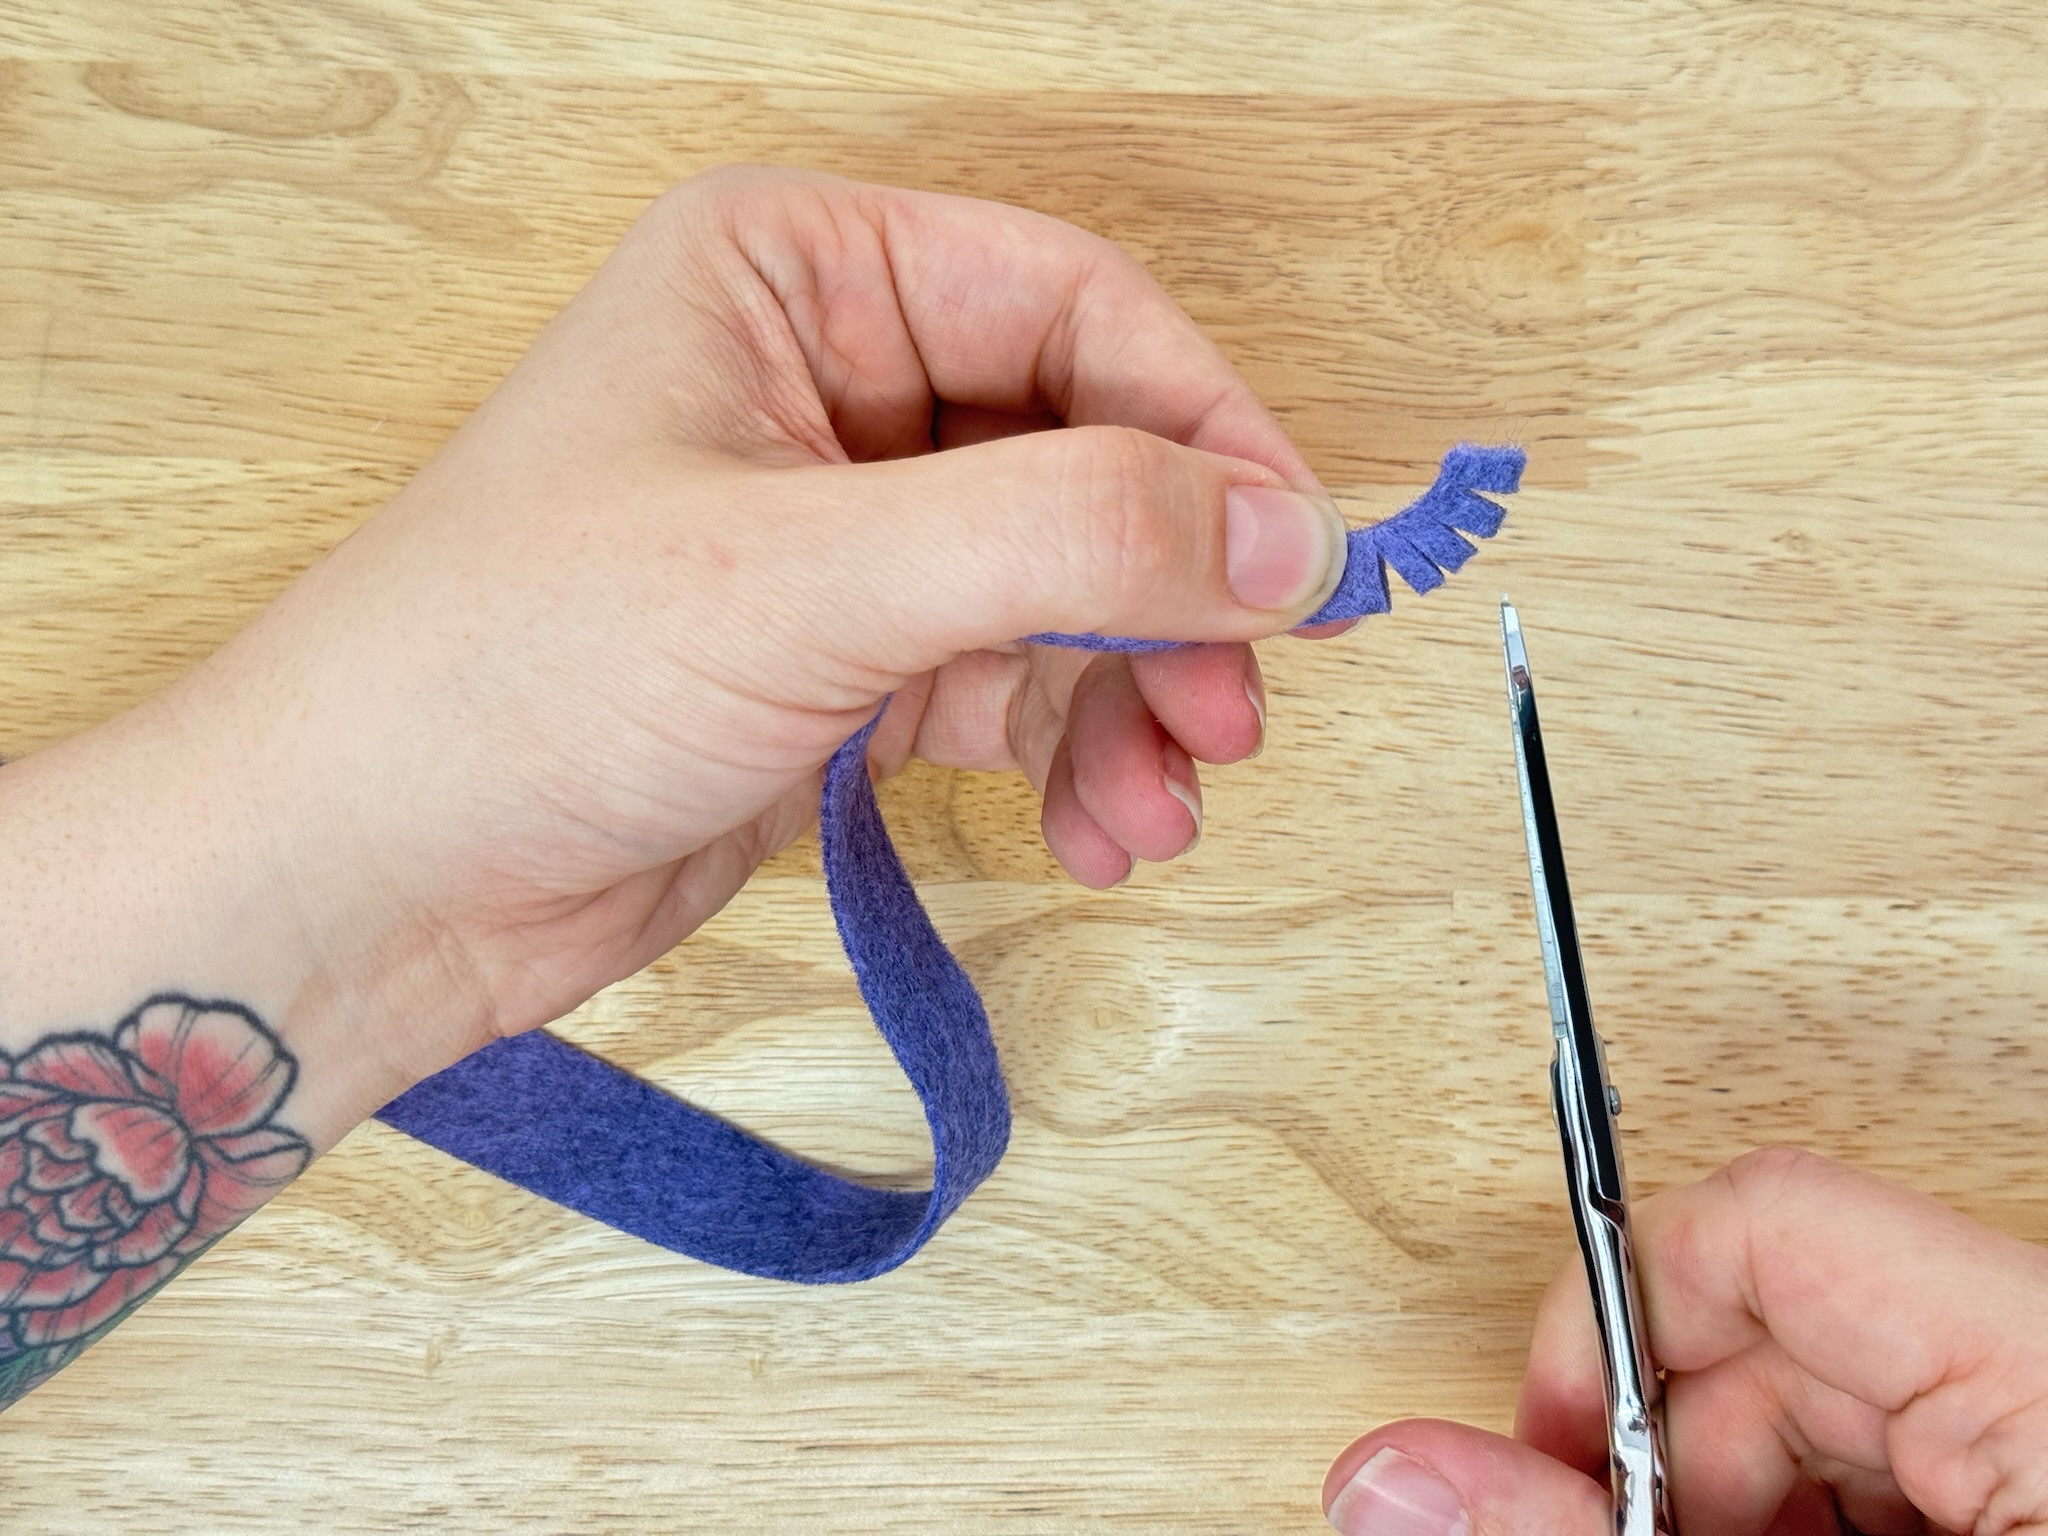
Cut the fringe. Hold or glue the flower felt strip in half. Cut into the folded edge, spacing your cuts about 1/8 inch apart and stopping just short of the glued edge. If a cut goes all the way through, it’s fine. Treat that spot as the end of one flower and the start of the next OR glue the strip back together.
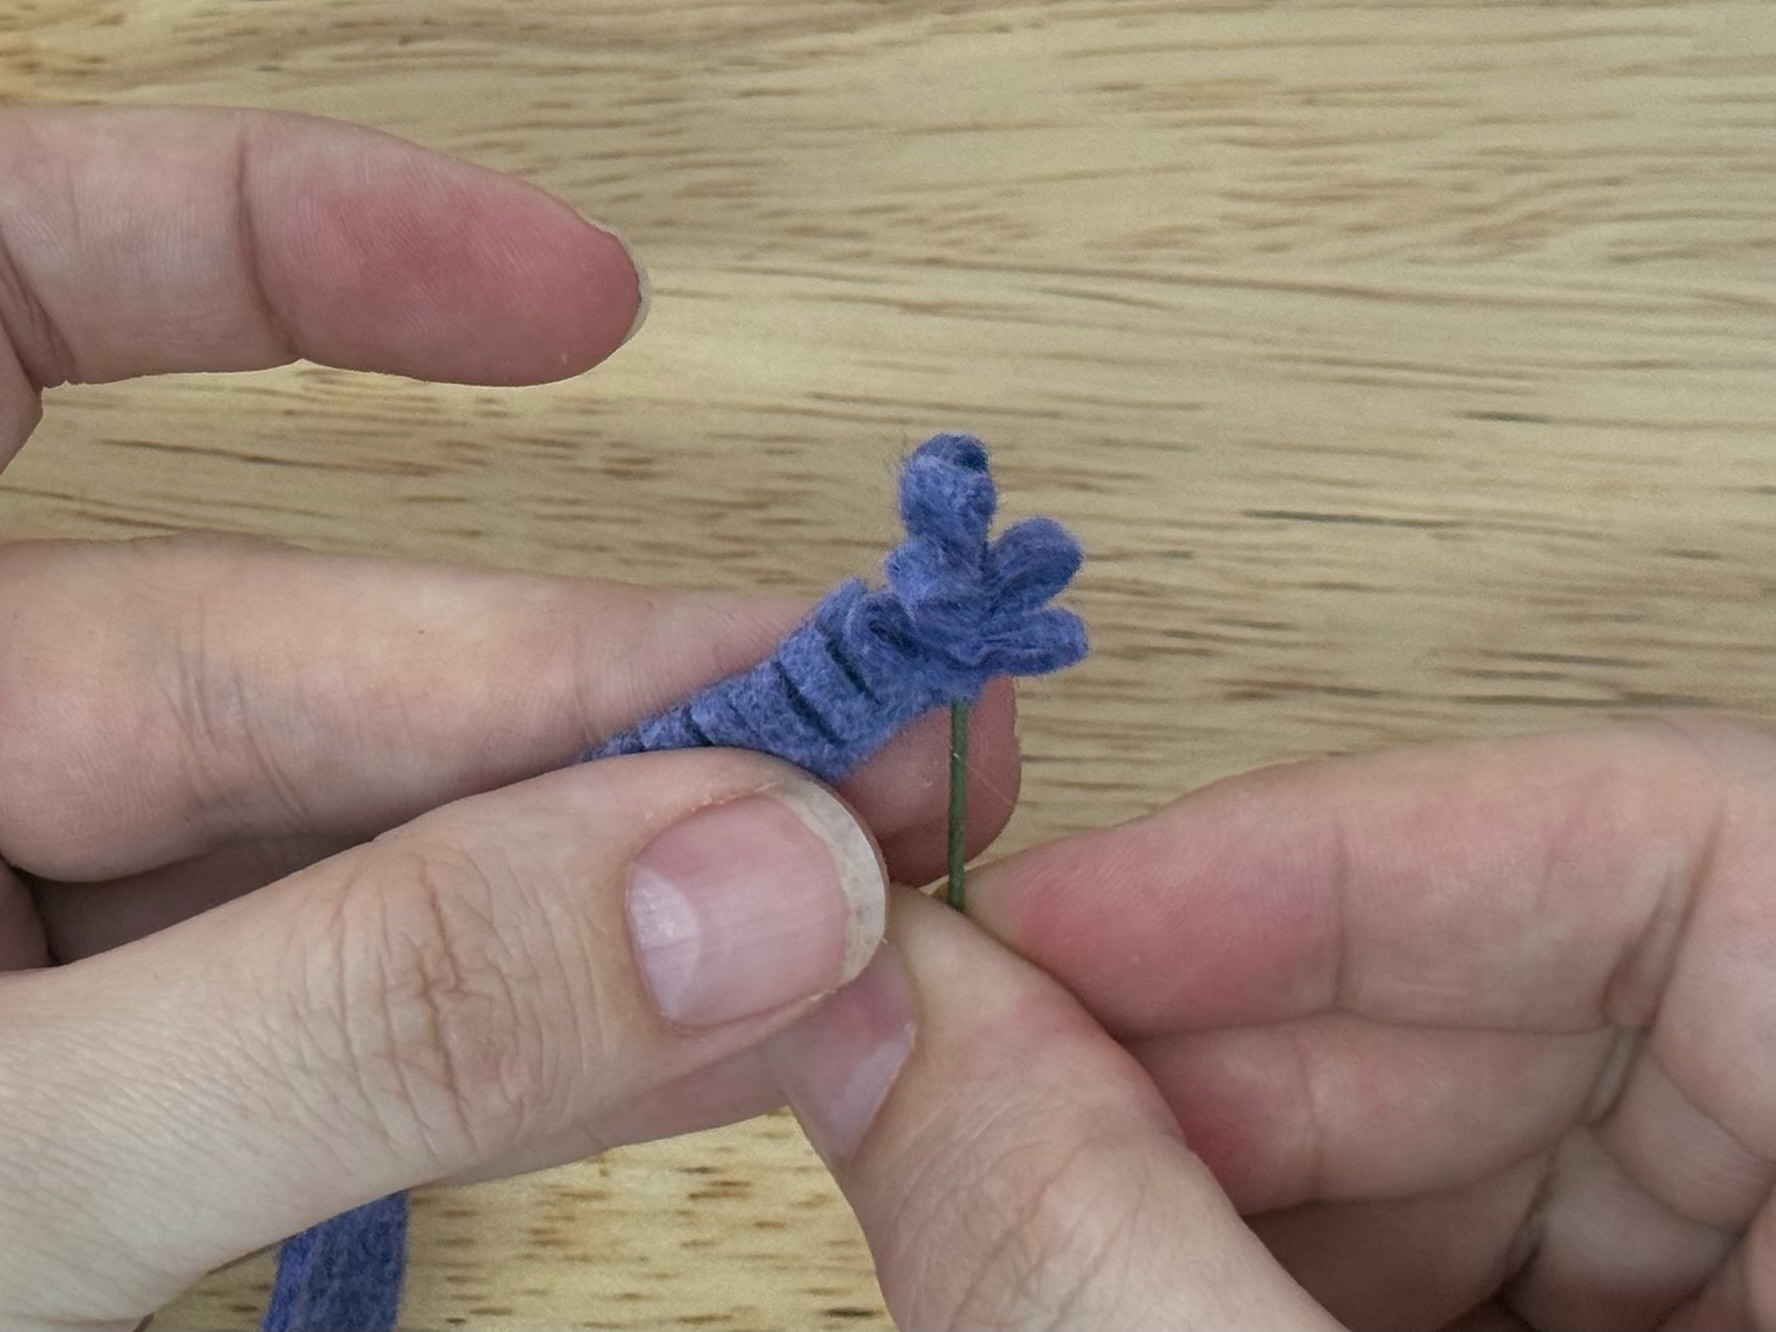
Wind the stem. Hot-glue a wire to the very end of the fringed strip, folded fringe edge pointing up. Wrap the fringe down the wire in a spiral, slightly overlapping as you go so the wire stays hidden. Your wrapping tension is the fluffiness dial: a loose wrap reads airy and cloud-like, a tight wrap reads dense and budded. Both are right.
When the flower is as tall as you like, cut the strip and glue the end down so the glue catches both the wire and some of the felt underneath. Felt glued only to felt can come un-spiraled, but glue that grabs the wire locks the whole bloom in place.
Sizing. You decide how big each bloom gets. Blooms don’t have to match; a little height variation is what makes the pot read as grown rather than manufactured.
4Plant it
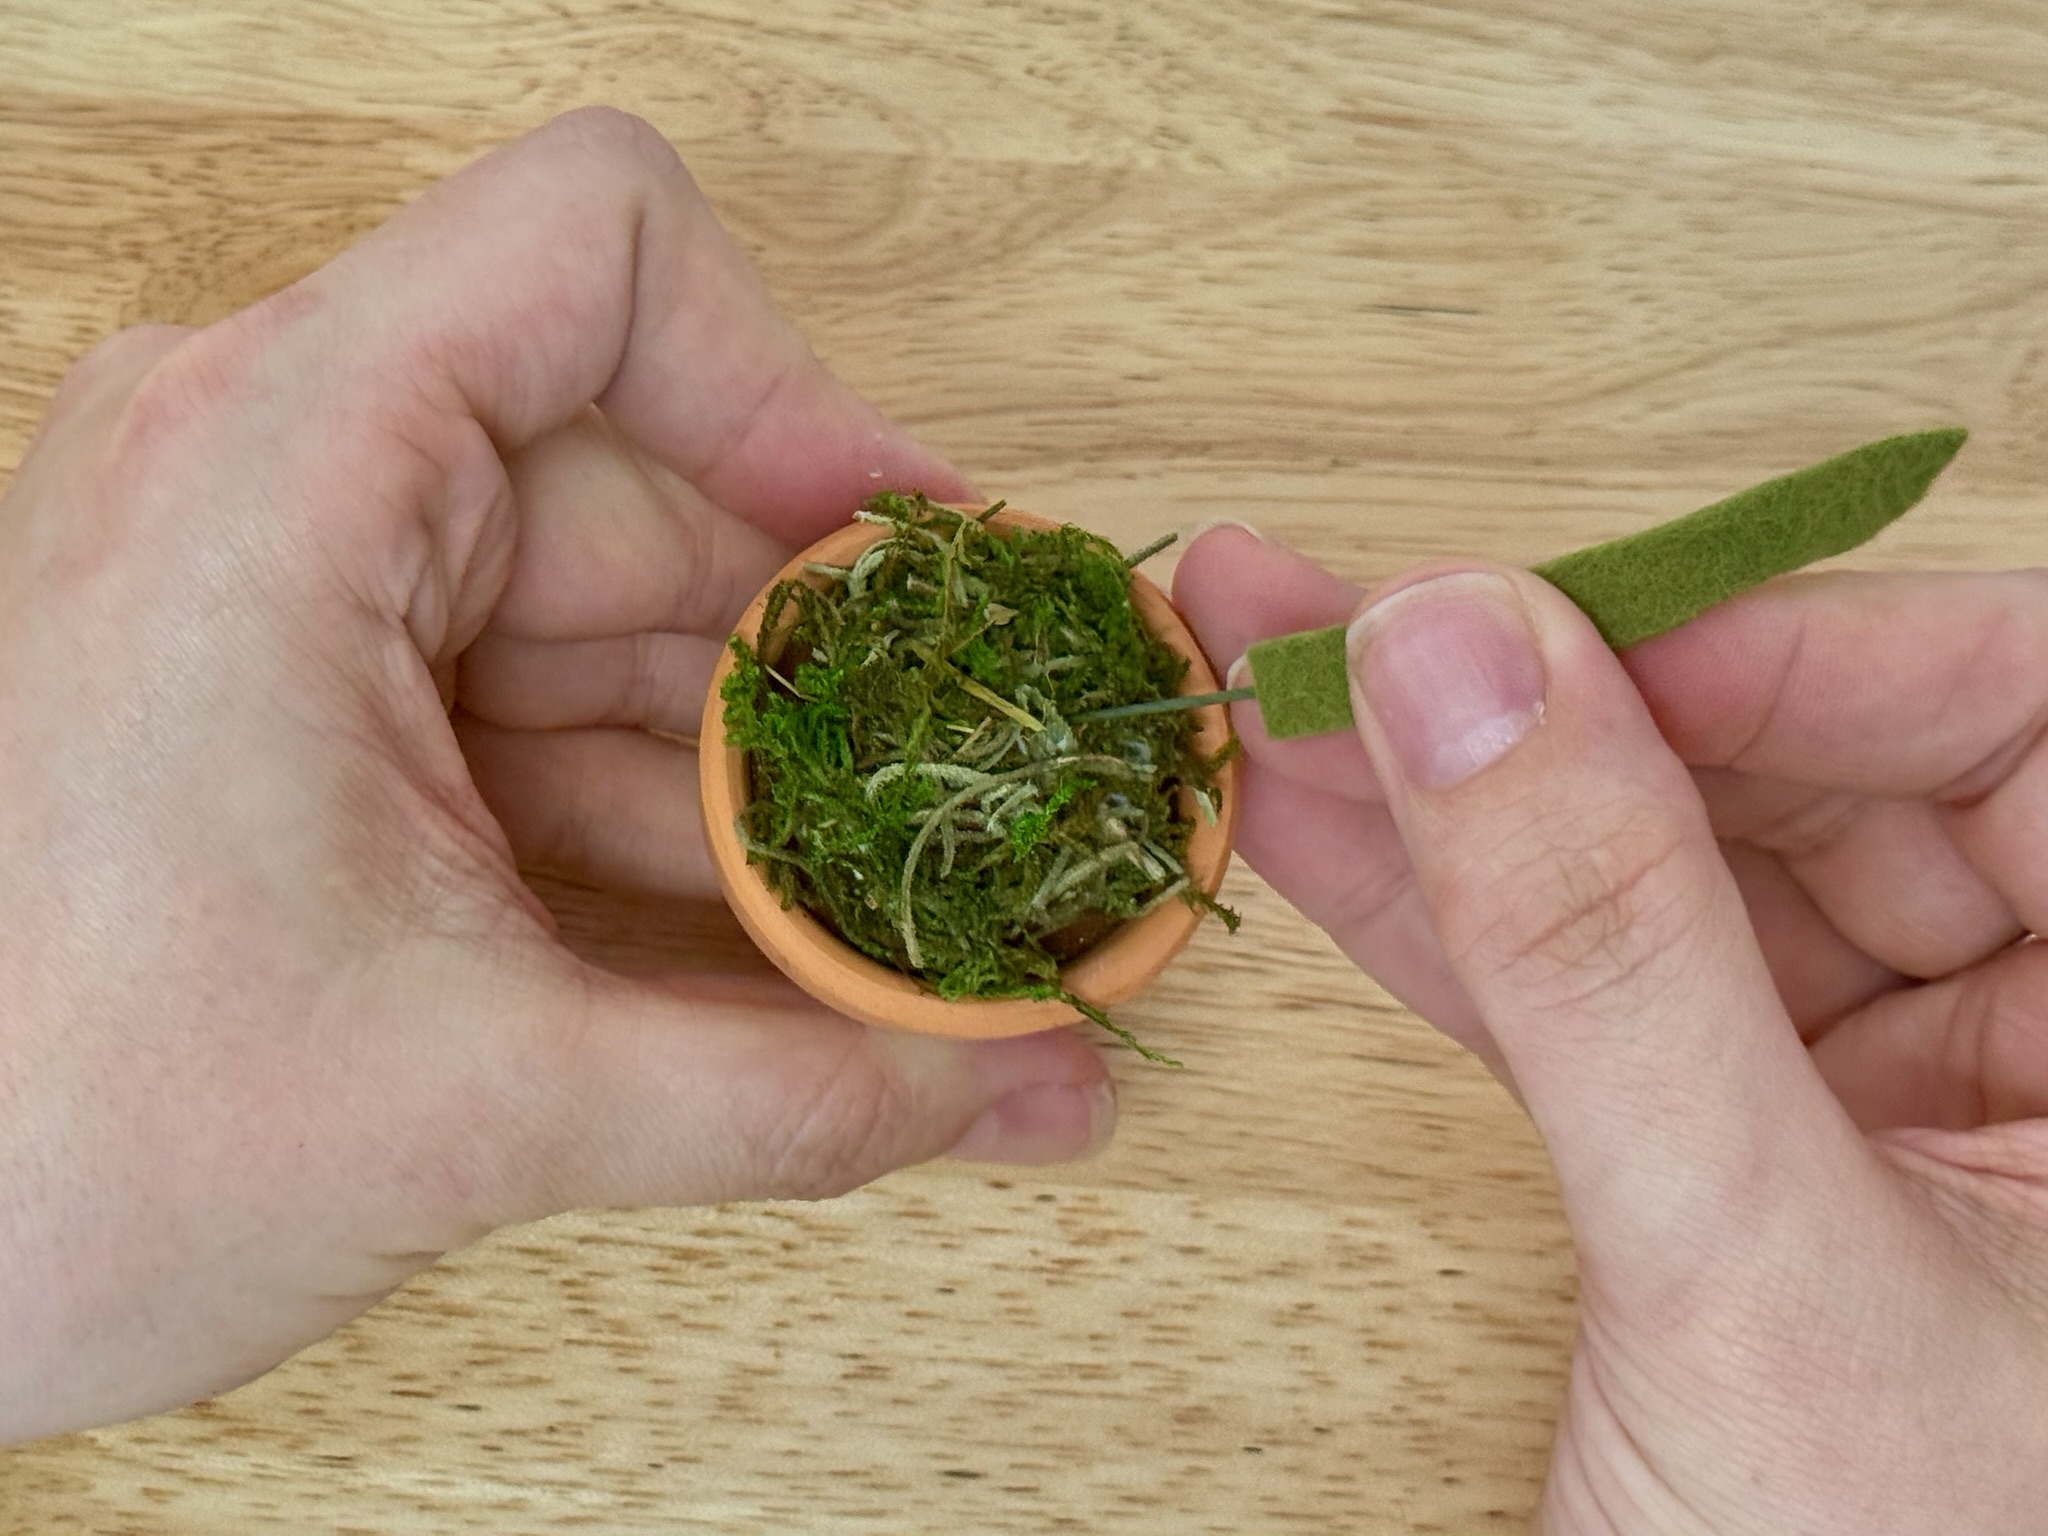
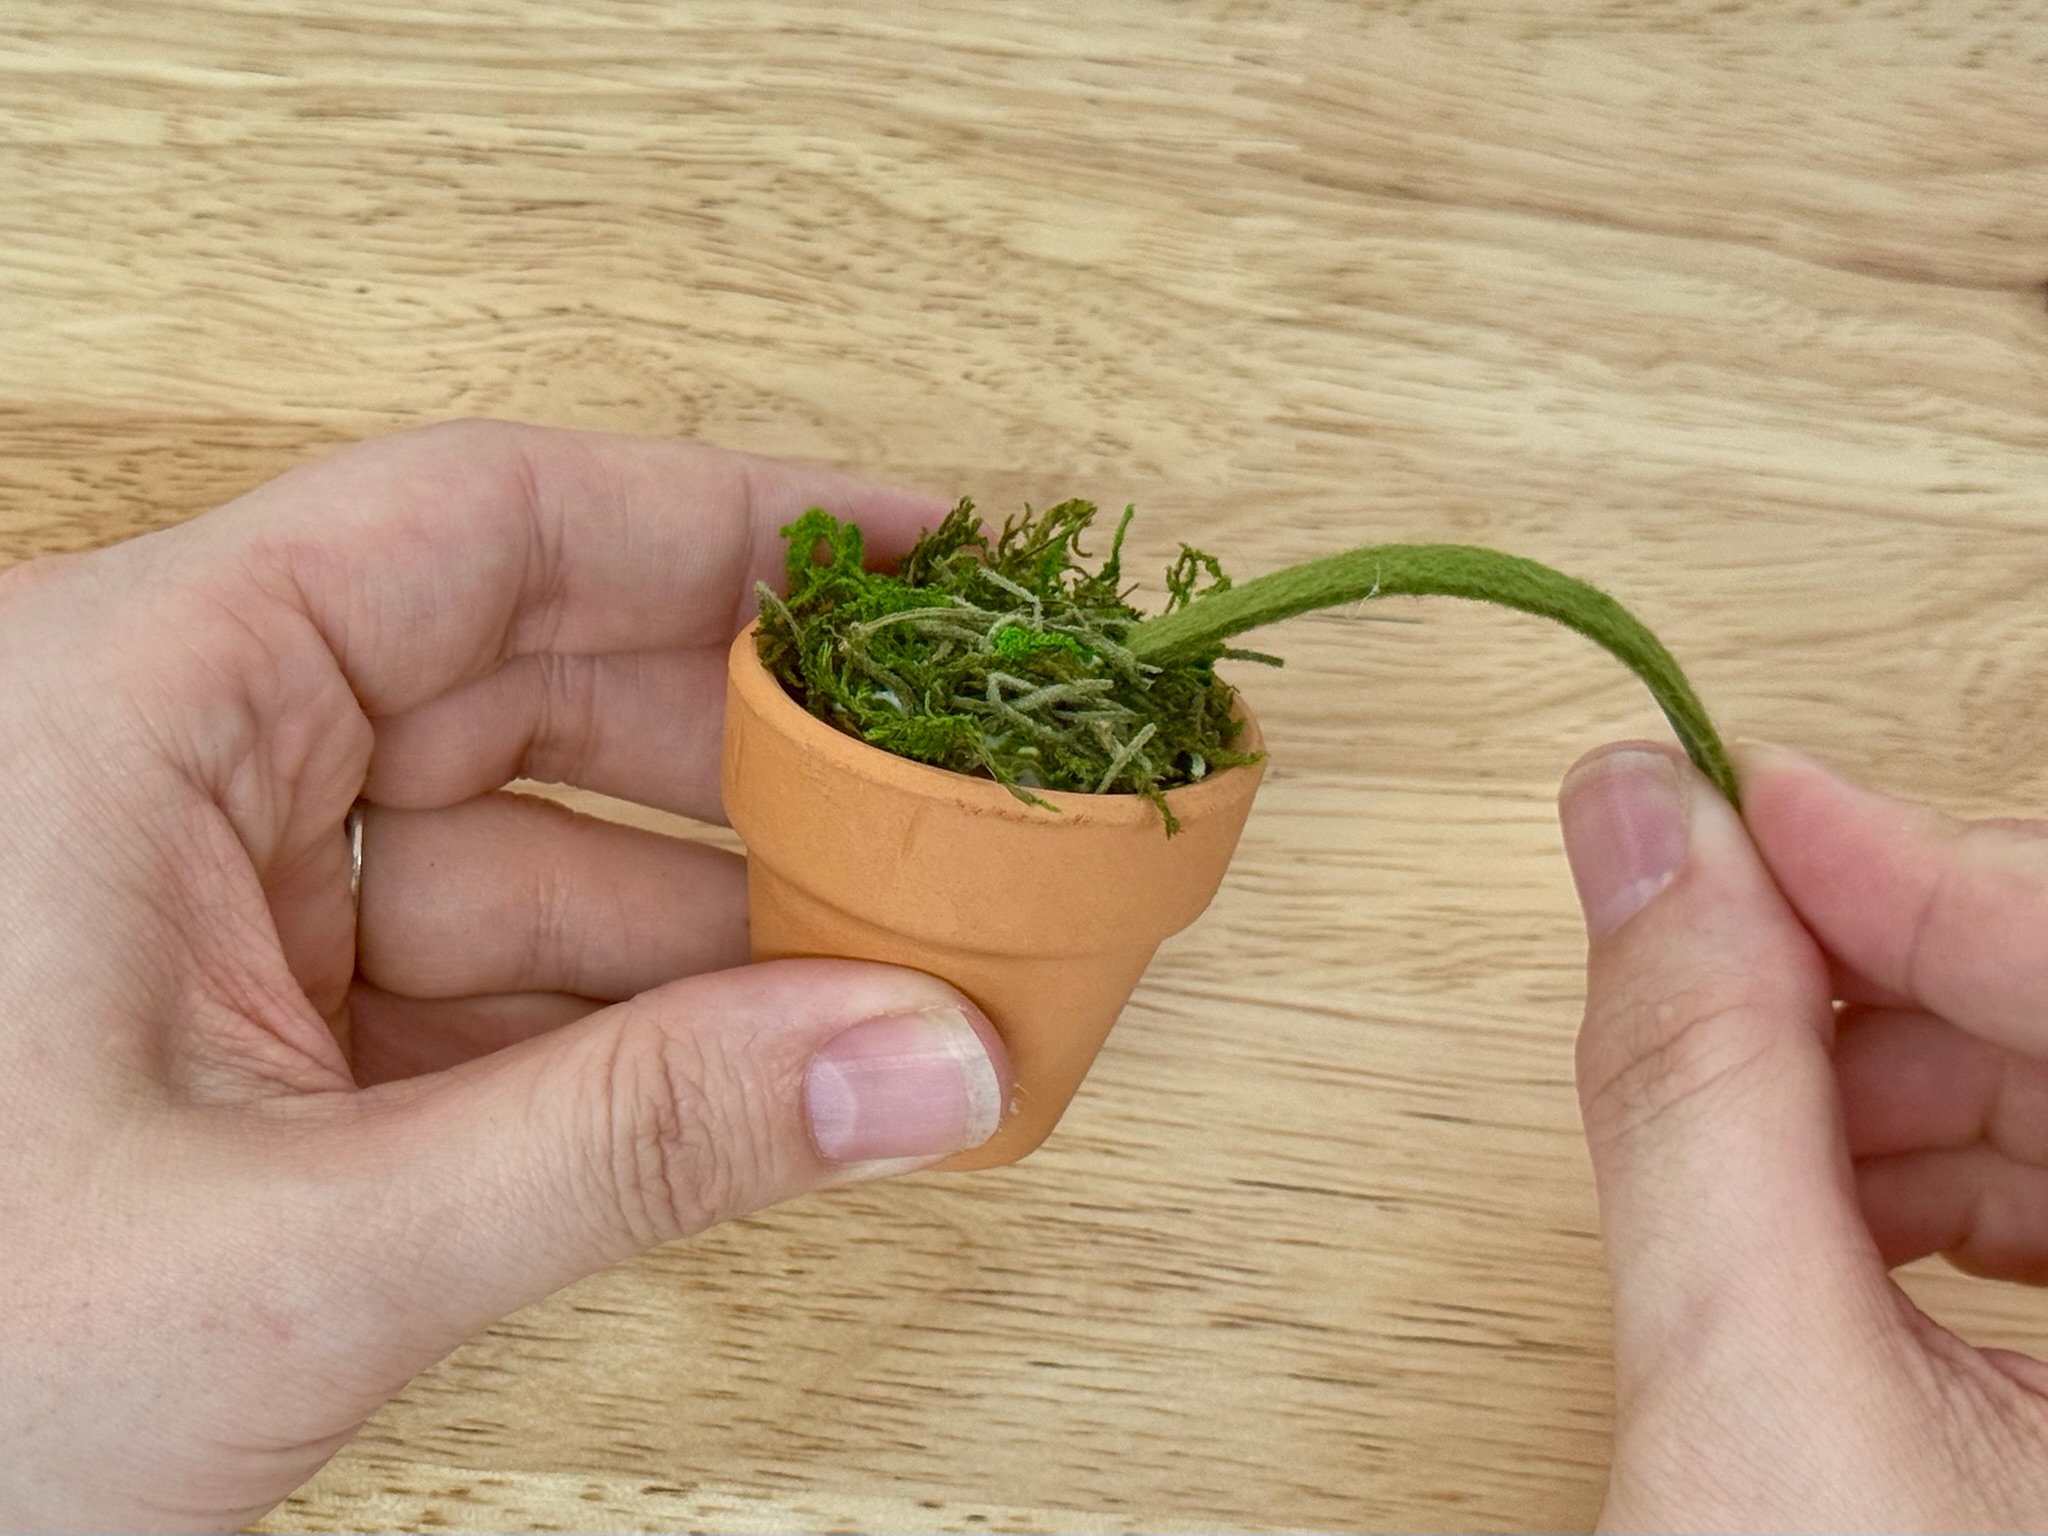
Start with the leaves. Push the leaf wires through the moss into the foam and adjust until you like the shape. Adding the leaves first gives you the plant’s overall silhouette.
Then add the flowers, taller ones toward the center. Before you glue anything, hold the pot out at arm’s length and slowly turn it. You’re checking the silhouette (the outline / general shape of the whole plant) and it’s much easier to see at a distance than up close. This is also the moment for that bonus wire: if one side looks sparse, an extra leaf or a seventh flower balances it.
Once you’re happy, pull the wires out one at a time, dab tacky glue on the end, and reinsert. Let it dry. Now curve those leaves over your finger into their final arcs.
5Decorate your pot (optional)
Wrap the twine around the pot twice and tie it into a bow at the front, securing the twine to the pot with hot glue in a couple places.
If you want a neater bow that sits square instead of pulling at an angle, do it in two pieces: measure off just enough twine to wrap the pot twice, glue that in place as you wrap. Then, tie the rest into a bow, trim the ends, and glue it over the spot where the wrap meets.
6Admire!
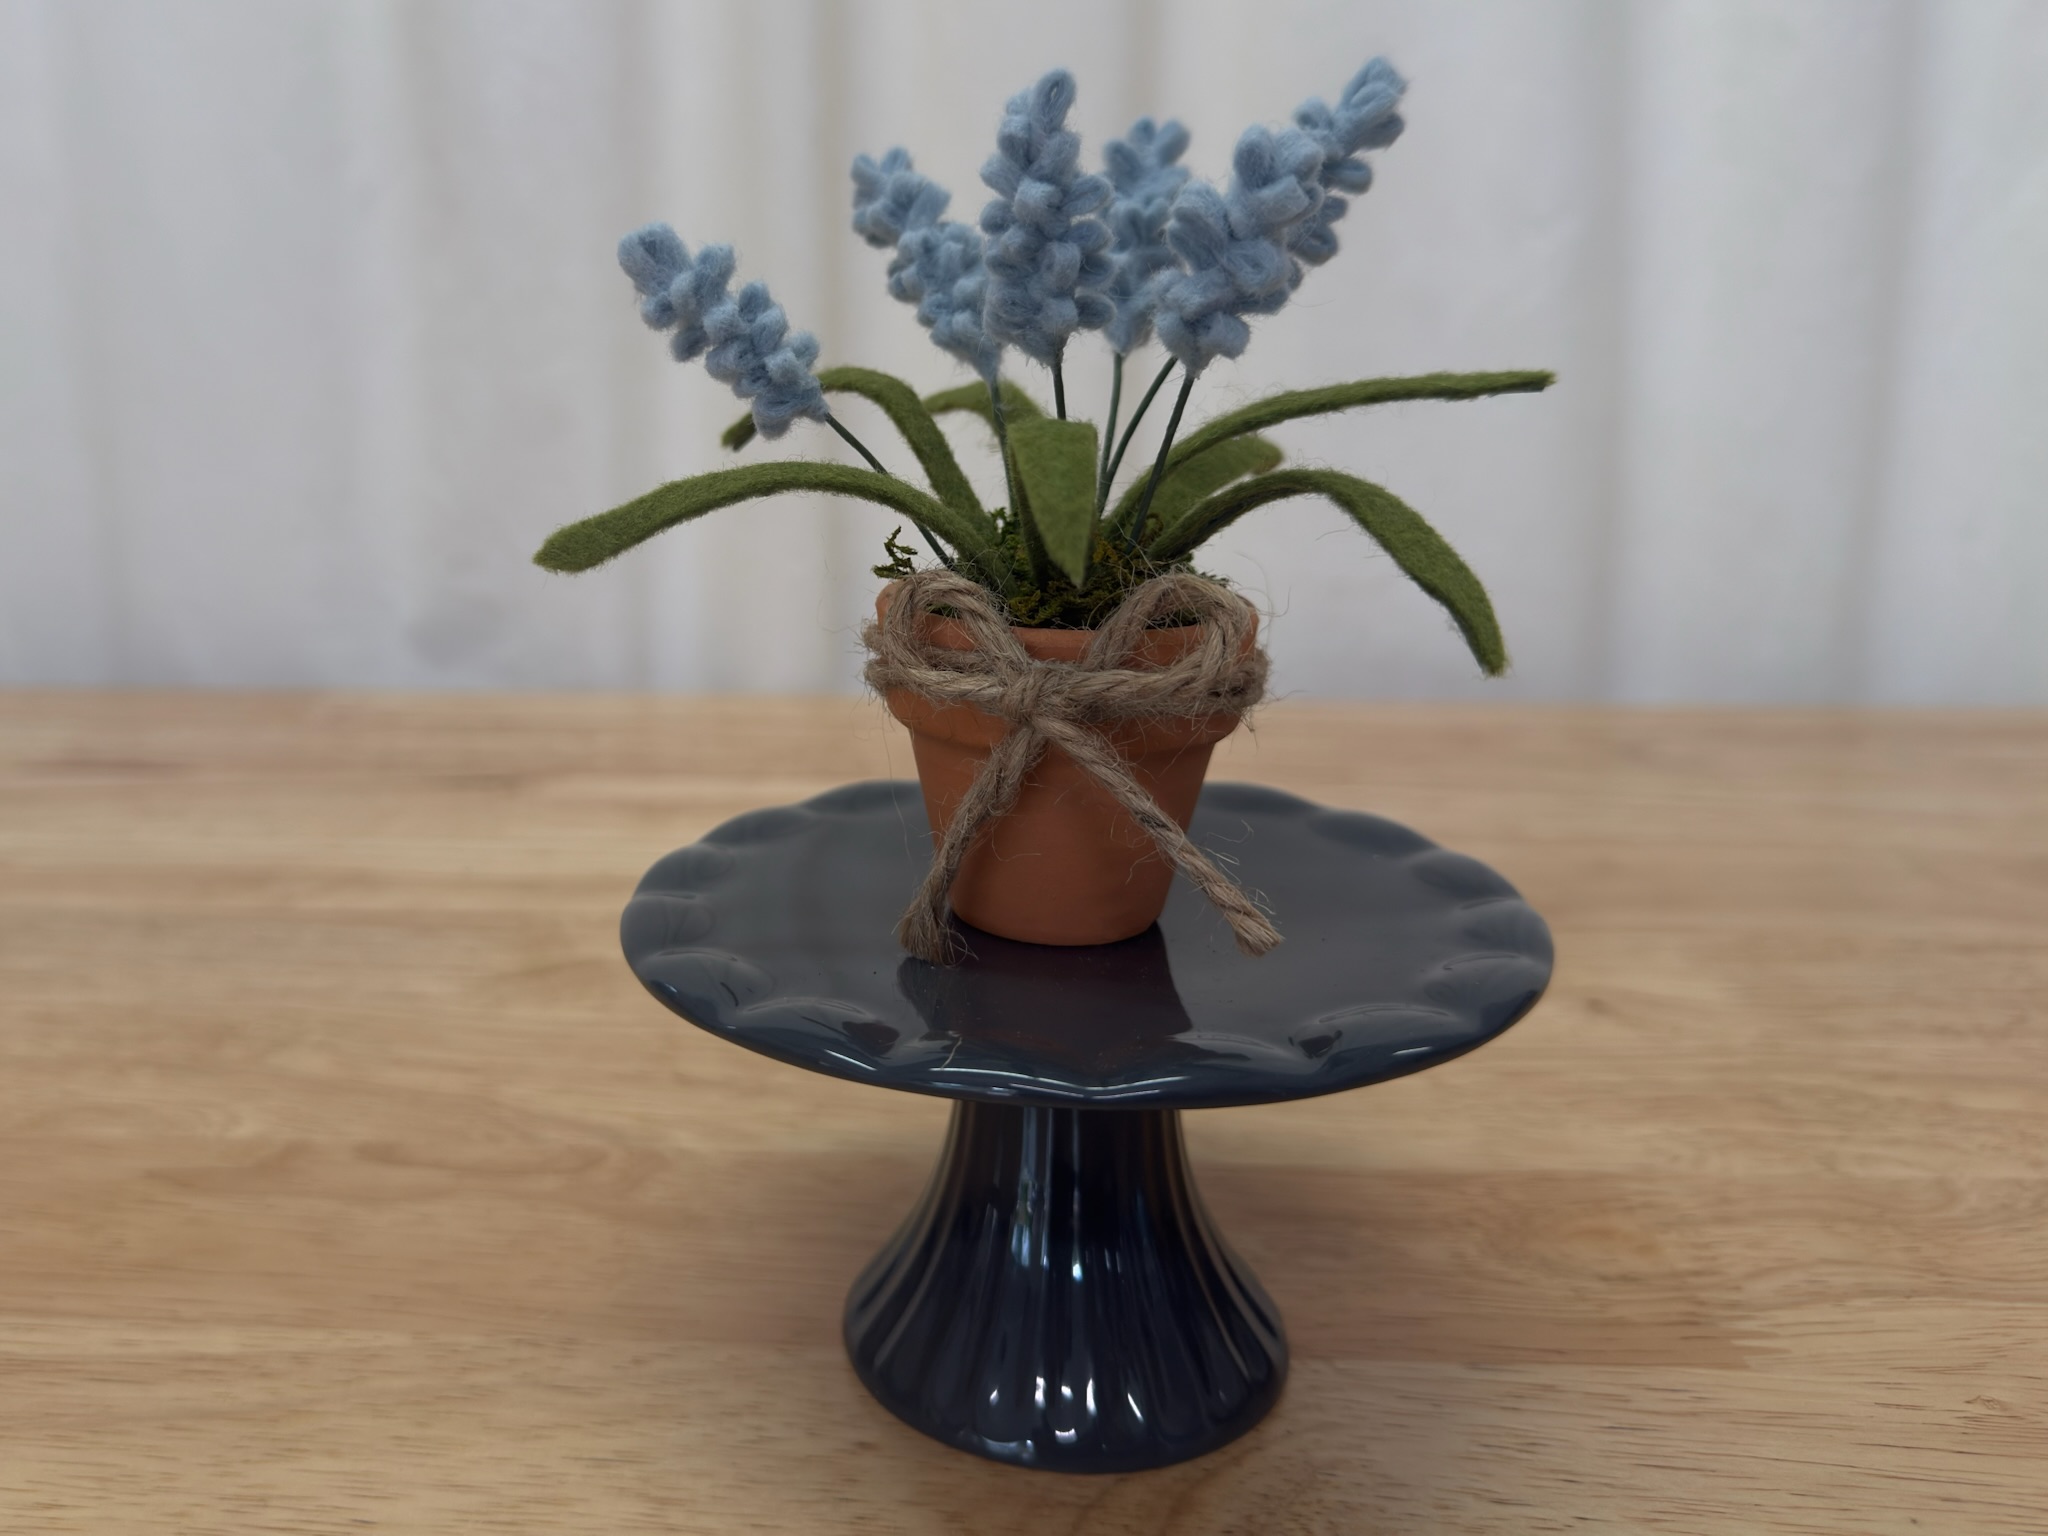
You just grew a tiny pot of cloud lavender. Find it a sunny windowsill to live on, and if you feel like sharing, a photo tagged @darilyndesigns would make our whole day.
Want the next kit first?
New kits, workshop dates, and free tutorials — straight to your inbox. No spam, ever.
Keep making
Fringe technique still in your fingers? Roll your leftover felt into something giftable.